
Accessible only to administrators to manage OSD national/regional settings.
What is the User roles tab?
The User roles tab is where you create and manage user accounts for your OSD instance. For each user, you define their email address, their global role in OSD, and (if applicable) their project-specific role and the projects they can access.
Before adding users, make sure your permission presets and stages are already configured (see the Shared presets and Permission assignment articles). Users inherit their permissions from those configurations.
To access User roles, go to: Admin > User roles
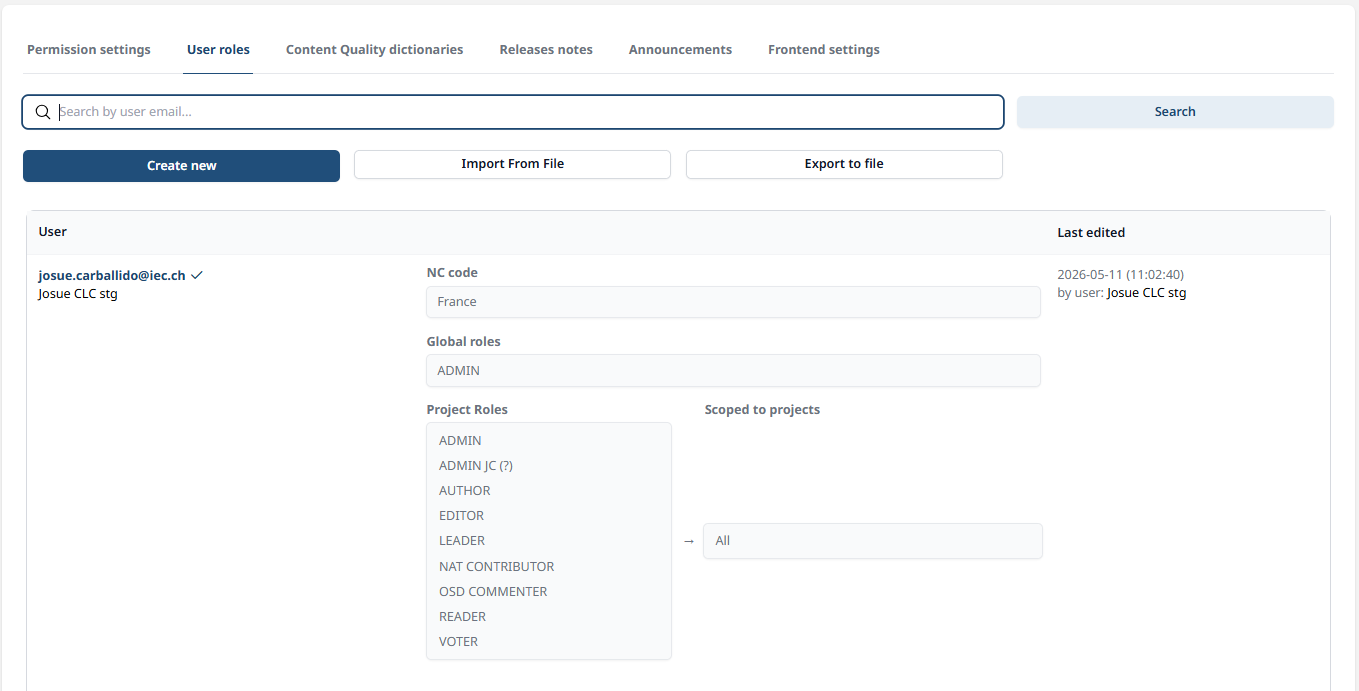
Each user entry shows:
-
Email — the user's login email address
-
National country code — the user’s country, to submit comments for the country’s NC
-
Global roles — the role applied to the user across the entire OSD instance
-
Project roles — a role scoped to specific projects (or All projects)
-
Scoped to projects — the projects this project role applies to. Leave empty to apply to all projects.
A user can hold more than one role. If multiple roles are assigned, Role priorities (see that article) determines which role is active by default when the user opens a project.
How to create a single user
-
Click Create new.
-
Enter the user's email address and click Confirm.
-
The user details panel will open. Fill in the National country code, Global roles, and if needed, Project roles and Scoped to projects.
-
Click Save when done, or Cancel to discard your changes.
OSD does not create passwords for users. Once you save the account, OSD automatically sends the user an email asking them to verify their address, set a password, and complete their profile. The activation link expires within 7 days. If the user does not activate in time, you can trigger a new password reset (see Forgot password).
How to create multiple users at once (bulk import)
If you need to add many users at the same time, use the bulk import function.
-
Click Export to file to download the current user list as an Excel template, or use a blank template.
-
Open the file and add your users, one per row. The columns are: Email, Global roles, Project roles, Project ids (leave Project ids blank to apply the project role to all projects).
-
Save the file.
-
Click Import From File, select your file, and confirm the upload.
Importing a file will overwrite the existing role data for any user already in the system. Before importing, export the current list and review it to avoid unintentionally changing existing users.
How to update a user
-
Find the user in the list (use the search bar to search by email address).
-
Click on the user to open their details.
-
Make your changes.
-
Click Save when done, or Cancel to discard your changes.
How to remove a user
-
Find and click on the user to open their details.
-
Click Remove at the bottom of the details panel.
-
Confirm the deletion.
Forgot password
Users manage their own passwords. If a user cannot log in, they can reset their password themselves from the Sign In screen by clicking “Forgot Password?”, entering their email address, and clicking Submit. They will receive a password reset email. The reset link expires within 5 minutes.
Administrators can also trigger this reset on behalf of a user by following the same steps.
How a user can switch roles inside a project
If a user has been assigned more than one role, they can switch between their roles once inside a project. To do this, they click on the project name in the OSD toolbar, then go to Actions > Change role and select the role they need.