
What is a shared preset?
A shared preset is a named collection of permissions that defines what a user with a given role can do inside OSD. For example, a preset might allow a user to edit document content, while another only allows them to read it.
Presets are created once and then reused across multiple roles and stages. This means you can update a preset in one place and the change applies everywhere it is used.
To access Shared presets, go to:
Admin > Permission settings > Shared presets
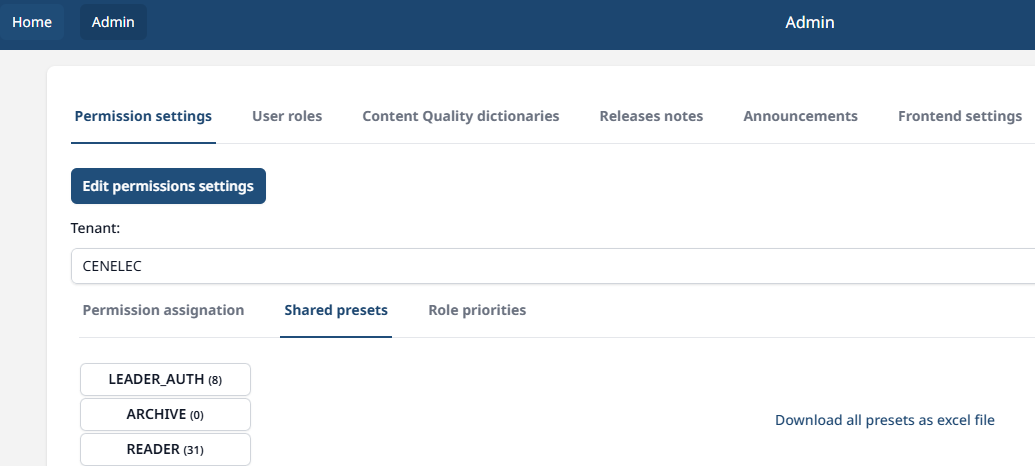
The Shared presets tab lists all existing presets. The number in brackets next to each preset name (e.g. READER (31) in the above example) shows how many role assignments are currently using that preset. This is important to check before making changes or deleting a preset.
The OSD Admin users are responsible for creating and updating presets, assigning presets to the relevant roles, and roles to the relevant stages based on the users' needs.
How to create a new preset
-
Click Edit permissions settings to enter “edit mode”.
-
Click Create new preset.
-
Enter a name for the preset and click Confirm.
-
The preset details panel will open automatically. Select the permissions you want to include.
-
Click Save when done, or Cancel to discard your changes.
-
Click Save again on the top right, to exit the “edit mode” and save the new preset.
How to update an existing preset
-
Click Edit permissions settings to enter “edit mode”.
-
Click on the preset you want to update.
-
The preset details panel will open. Make your changes.
-
Click Save when done, or Cancel to discard your changes.
-
Click Save again on the top right, to exit the “edit mode” and save the new preset.
Updating a preset affects all roles that use it, across all stages. Check the assignment count before making changes so you understand the impact.
How to delete a preset
-
Click Edit permissions settings to enter edit mode.
-
Ensure the assignment count (number in brackets) of the preset you want to delete is 0.
-
Click on the preset you want to delete.
-
Click Remove preset in the preset details panel.
-
Click Save again on the top right, to exit the “edit mode” and save the new preset.